Ozone: Custom Analog Wrist Watch
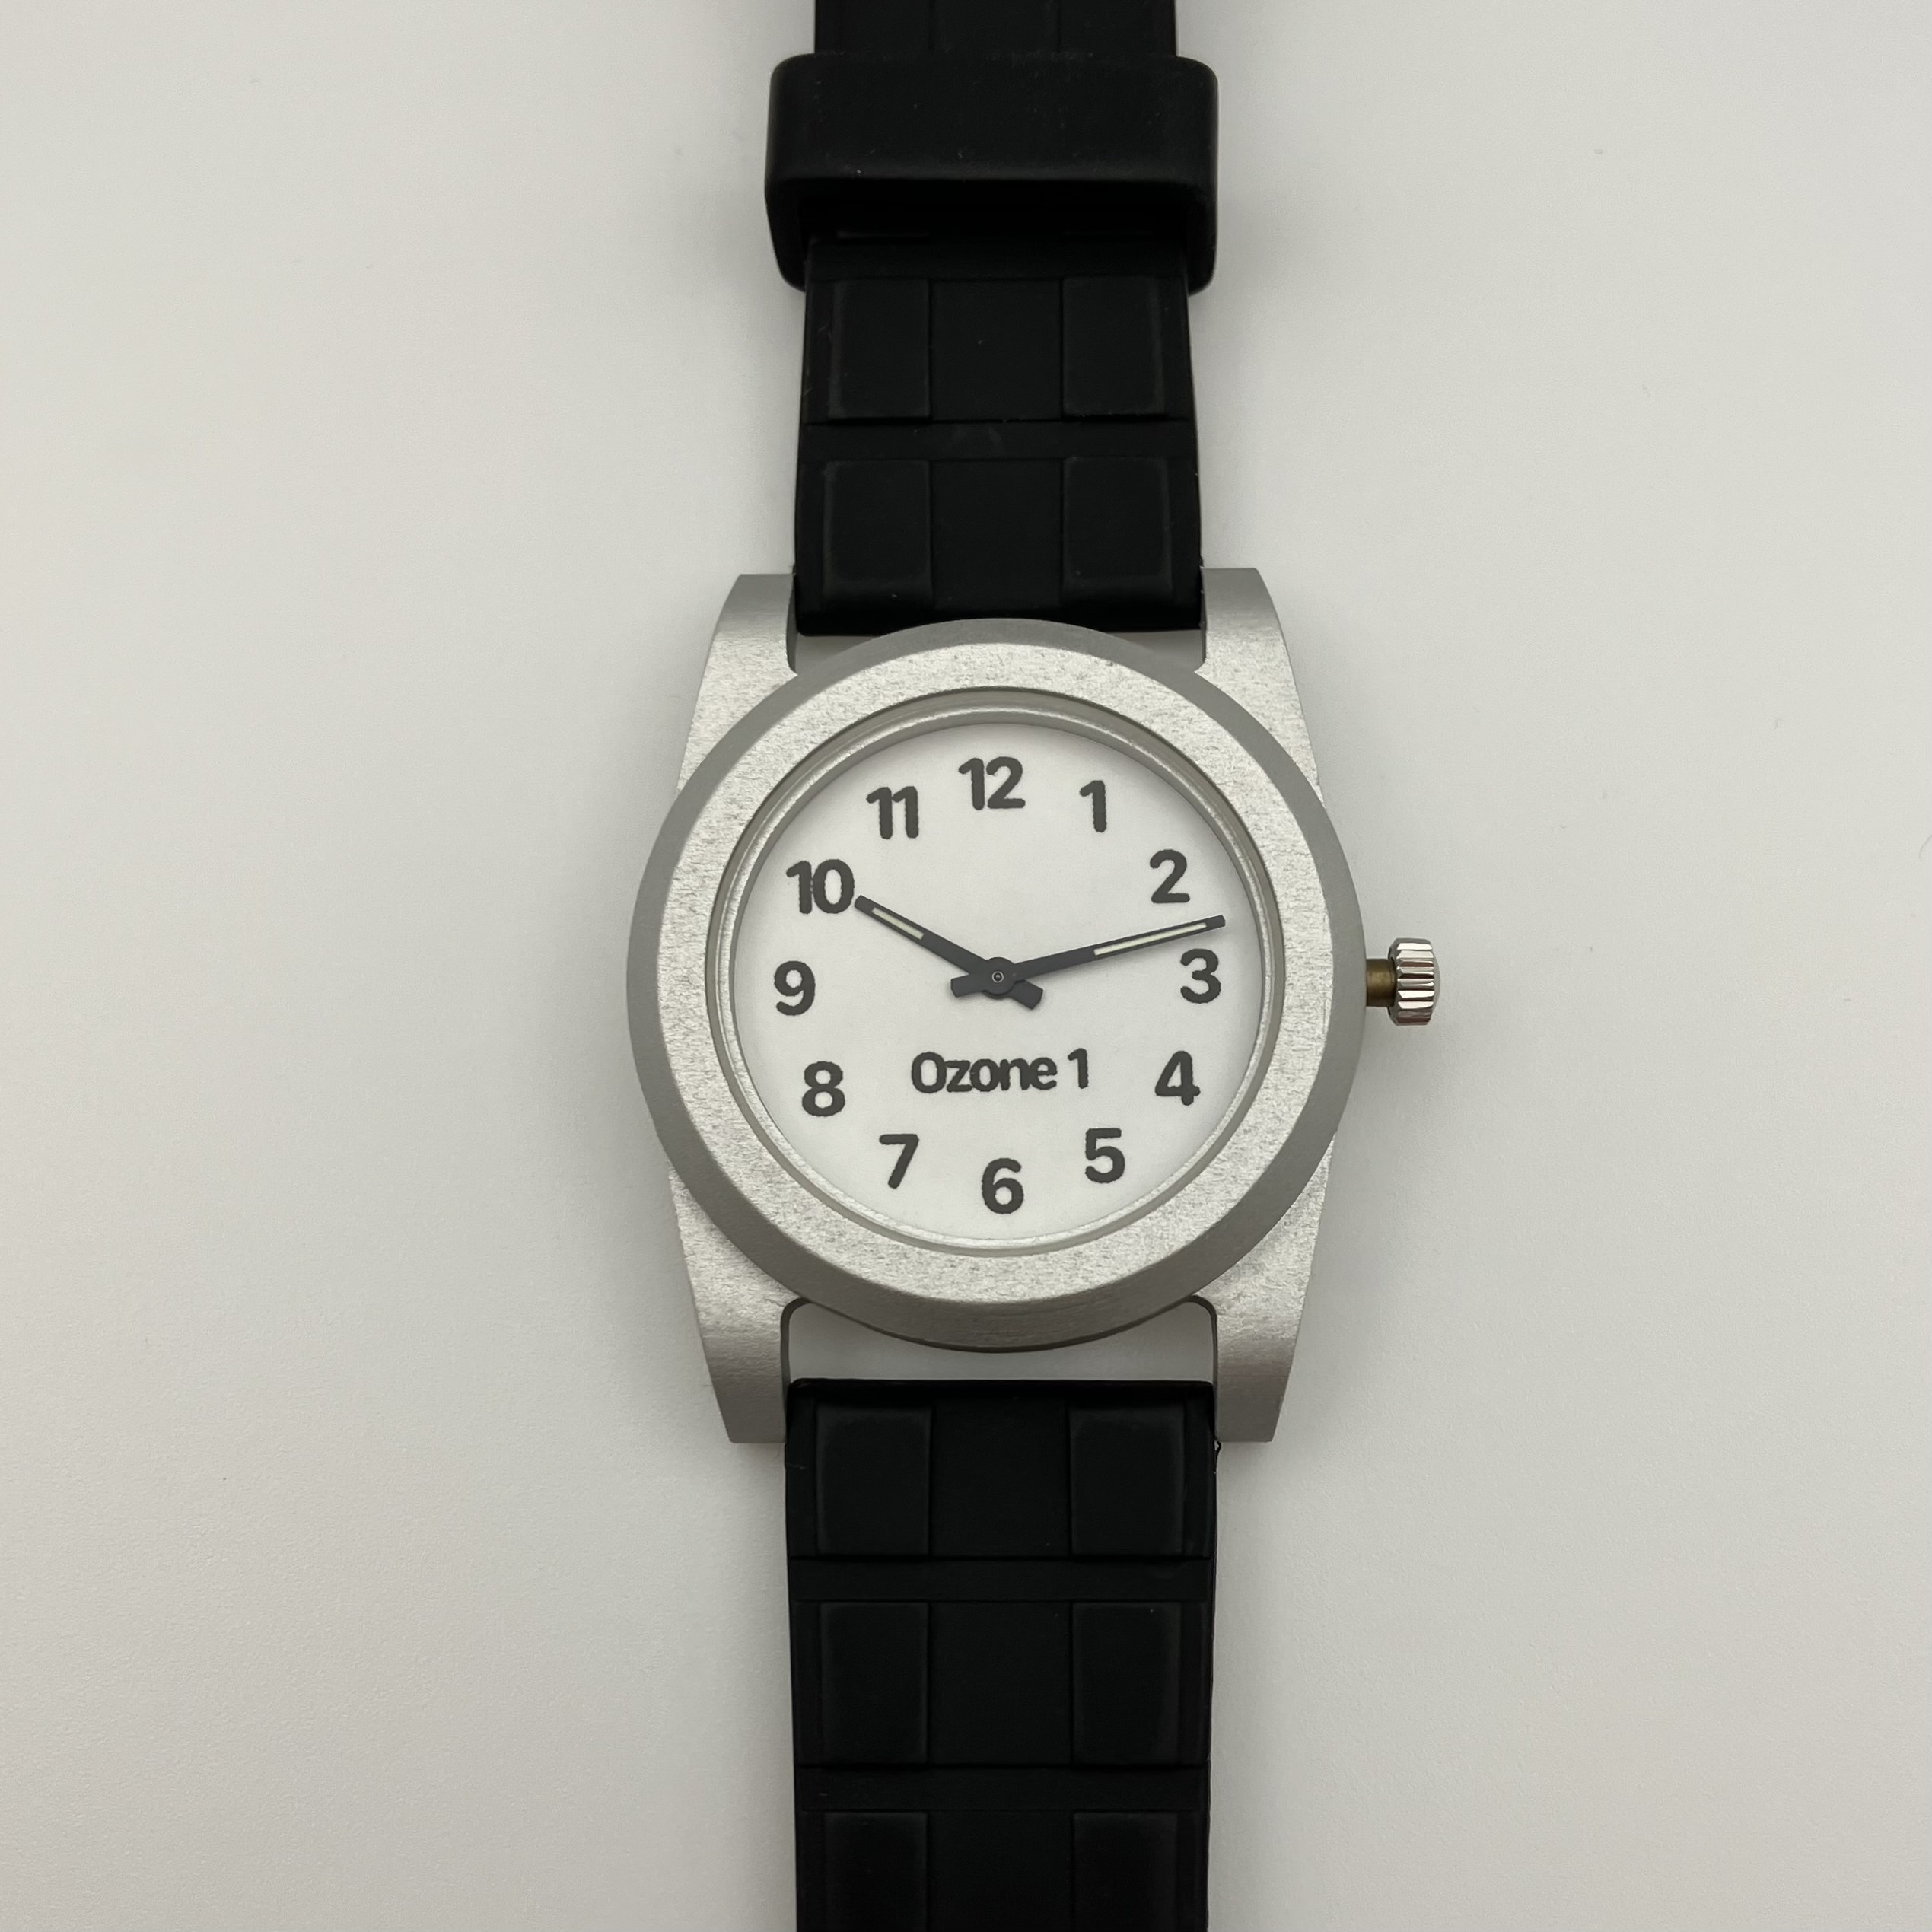
I recently finished designing and assembling Ozone, a custom quartz wrist watch for daily wear. Ozone is not only my first attempt at making a watch, but also my first mechanically-oriented project where form matters just as much as function. Most of my other projects focus solely on function. Overall, I am pleased with how it came out.
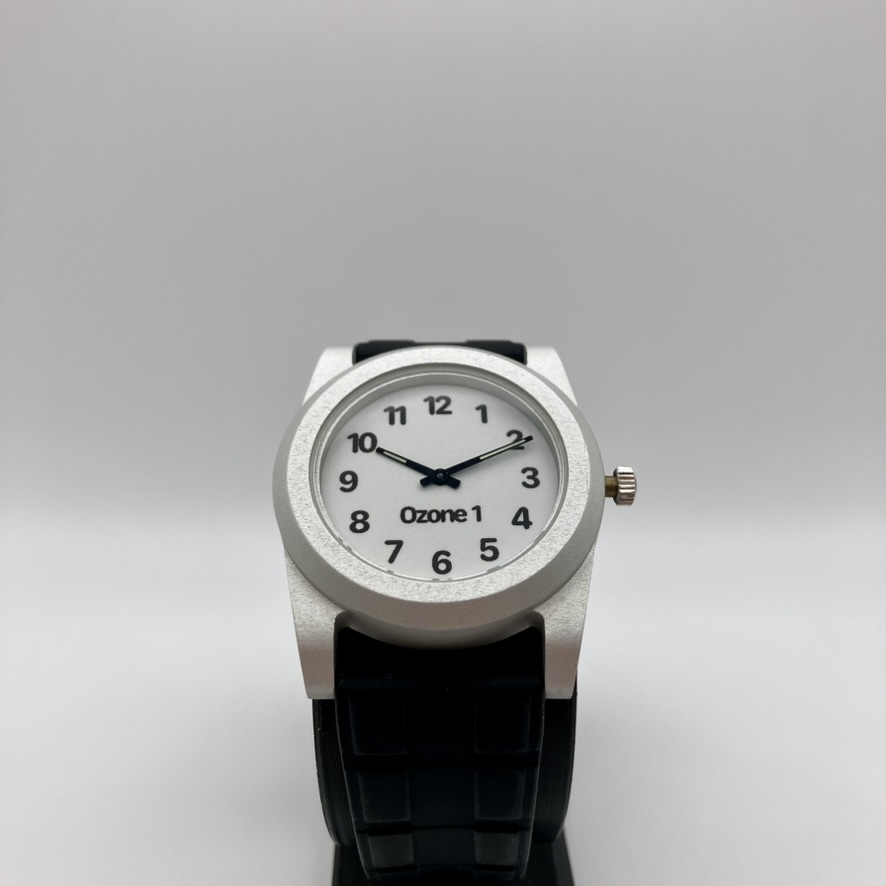
I have intentionally kept Ozone’s design simple. The watch does not have any complications to tell you the month, date, or day of the week. It does not have any buttons or usable moving parts except for the crown. All it does is tell you the current hour and minute. I will likely make another watch in the future, and on that one, maybe include some other useful functionality. But for now, this was the right place to start.
While I designed and sourced everything in the watch, it was not feasible for me to manufacture everything. For example, while I designed the watch case, it was machined by JLC. The dial and internal retention pieces were simple enough to design and 3D print on my own. Smaller pieces such as the crown, watch hands, and movement, were sourced and purchased individually.
What follows are some notes on the project. These are meant as a reference for future-me, in case I decide to make another watch, but maybe someone else will find them interesting. The BOM and design files can be found on the project’s Git repo.
Anatomy of my Watch
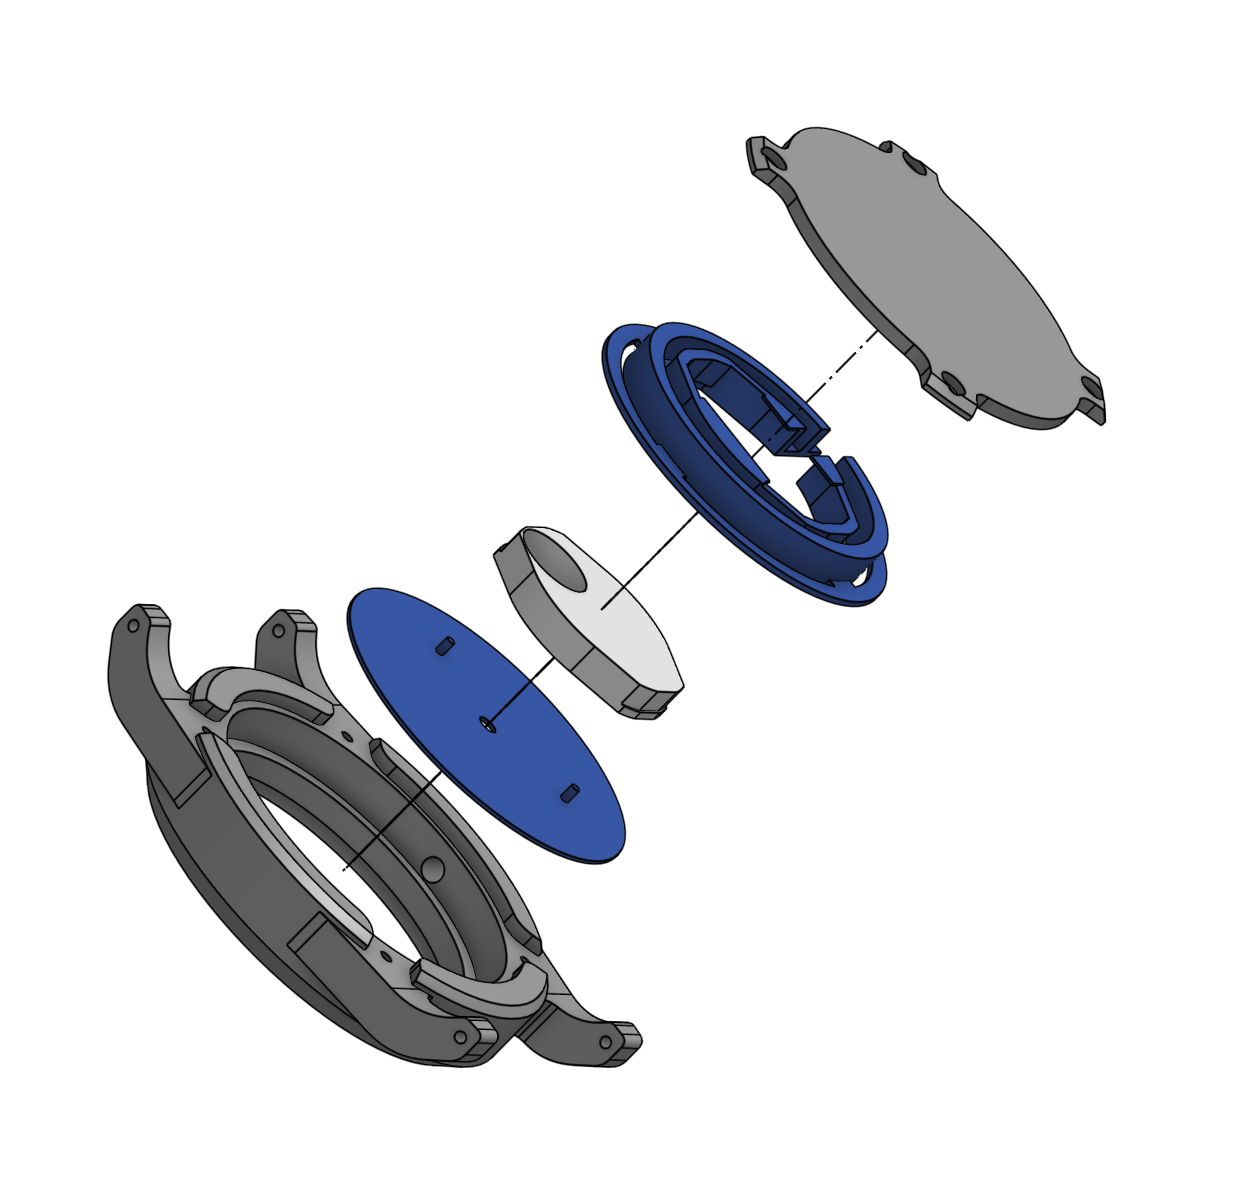
Ozone is composed of the following parts:
- The watch mechanism (called the “movement”)
- The movement retainer
- The front case
- The rear case
- The stem, crown, and crown tube
- The dial and hands
- The crystal and its gasket
Let’s explore the major parts in more detail.
The Case
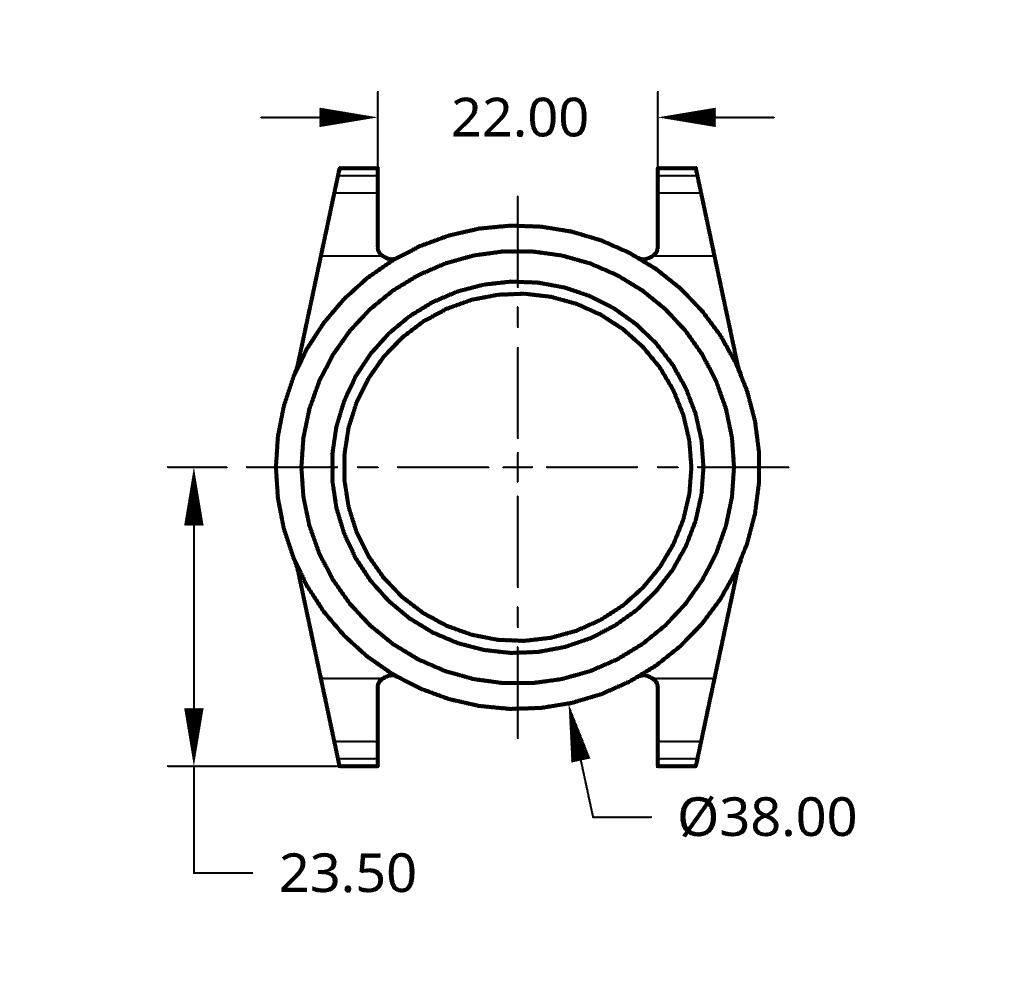
I kept Ozone’s case very simple from both an aesthetic and mechanical point of view. The case was designed to be 38mm in diameter, which is a common size for men’s watches, with 22mm lugs. The lugs extend out from the watch by 4.5mm. These dimensions more-or-less match the dimensions of a cheap watch that seemed the right size for me.
I guessed on the shape of the lugs’ side profile, and then iterated on the design by 3D printing and making adjustments until I liked it.
The body of the front case is broken into three regions: The movement cavity, the display area, and the bezel. The movement cavity is where the watch movement and dial sit inside the case. The display area is where the watch hands live. The bezel holds the crystal and crystal gasket into place.

The movement cavity is 30 mm in diameter and 3.59 mm thick. This is about 0.2 mm thicker than the expected combined thickness of the movement and dial. This is important; as dicussed later, the rear case helps keep everything in place.
The display area has a diameter of 27.3 mm, which is large enough to comfortably fit whatever dial markings and hands I want. The area is 2.18 mm thick, just slightly thicker than the recommendation from my movement’s datasheet. The transition from the movement cavity to the display area forms a small lip that the dial sits on when installed.
The inner-diameter of the bezel is 29.2mm, which is 8.8mm smaller than the outer diameter of the case. If I end up making a second version of the watch, I’ll probably make the bezel thinner by increasing the inner-diameter so I can fit a larger crystal into the same case footprint.
The side of the case has a 2.1mm hole drilled through it for the watch stem and crown tube. A crown tube is press fit into the hole. The case-end of the tube is 2.2 mm in diameter, the crown end is 2.5 mm, and the total length is 4.9 mm.
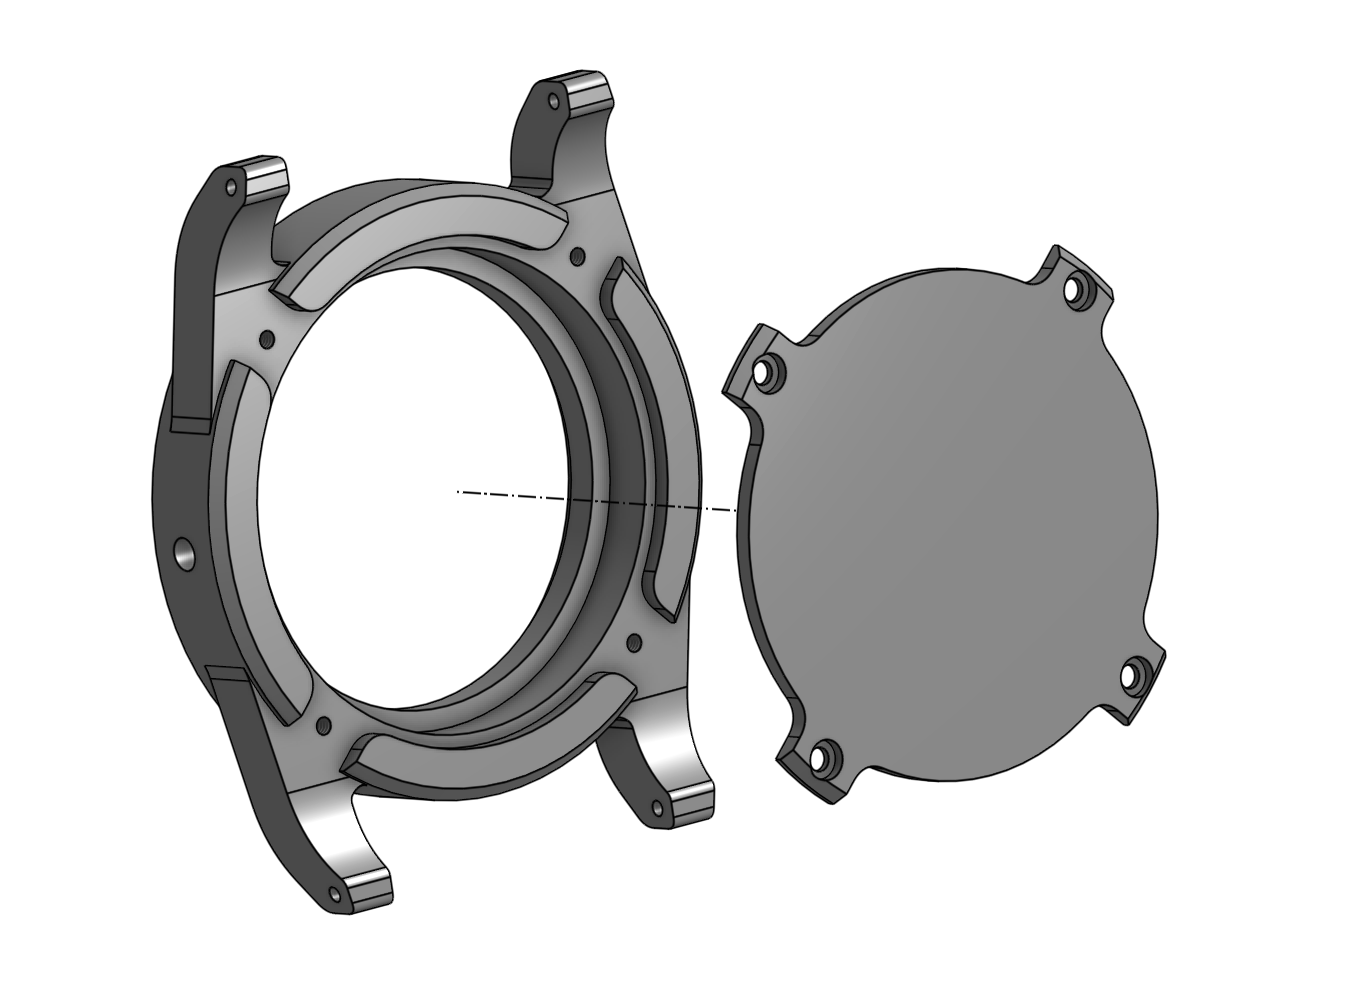
On many watches, the rear of the of the watch screws into the case and is sealed by a gasket to prevent water from entering. To change the battery, all you need to do is unscrew the back. Or, the rear snaps onto the front case and can be removed by prying it open with a thin screw driver. This allows for the rear case to be attached to the front case without screws. Because this was my first time designing a part that would be CNC machined, I wasn’t overly confident and wanted to keep my attachment method simple. So instead, I opted to to make the rear case secure to the front case by four M1.4 screws (often used for glasses). The result is less slick, but is only visible when the watch is upside down and off my wrist, which doesn’t happen much. Also, I kinda dig the look.
I had the case machined out of aluminum, bead blasted, and then annodized by JLC. I left the part a “natural” matte color. This gave the watch case an industrial look, which I am a fan of, but I also think it’d look great if it were sanded and polished. On a future revision of the watch, I may order a second one and take the the time to detail the case. This would hopefully give a nice, refined look.
The Movement and Retainer
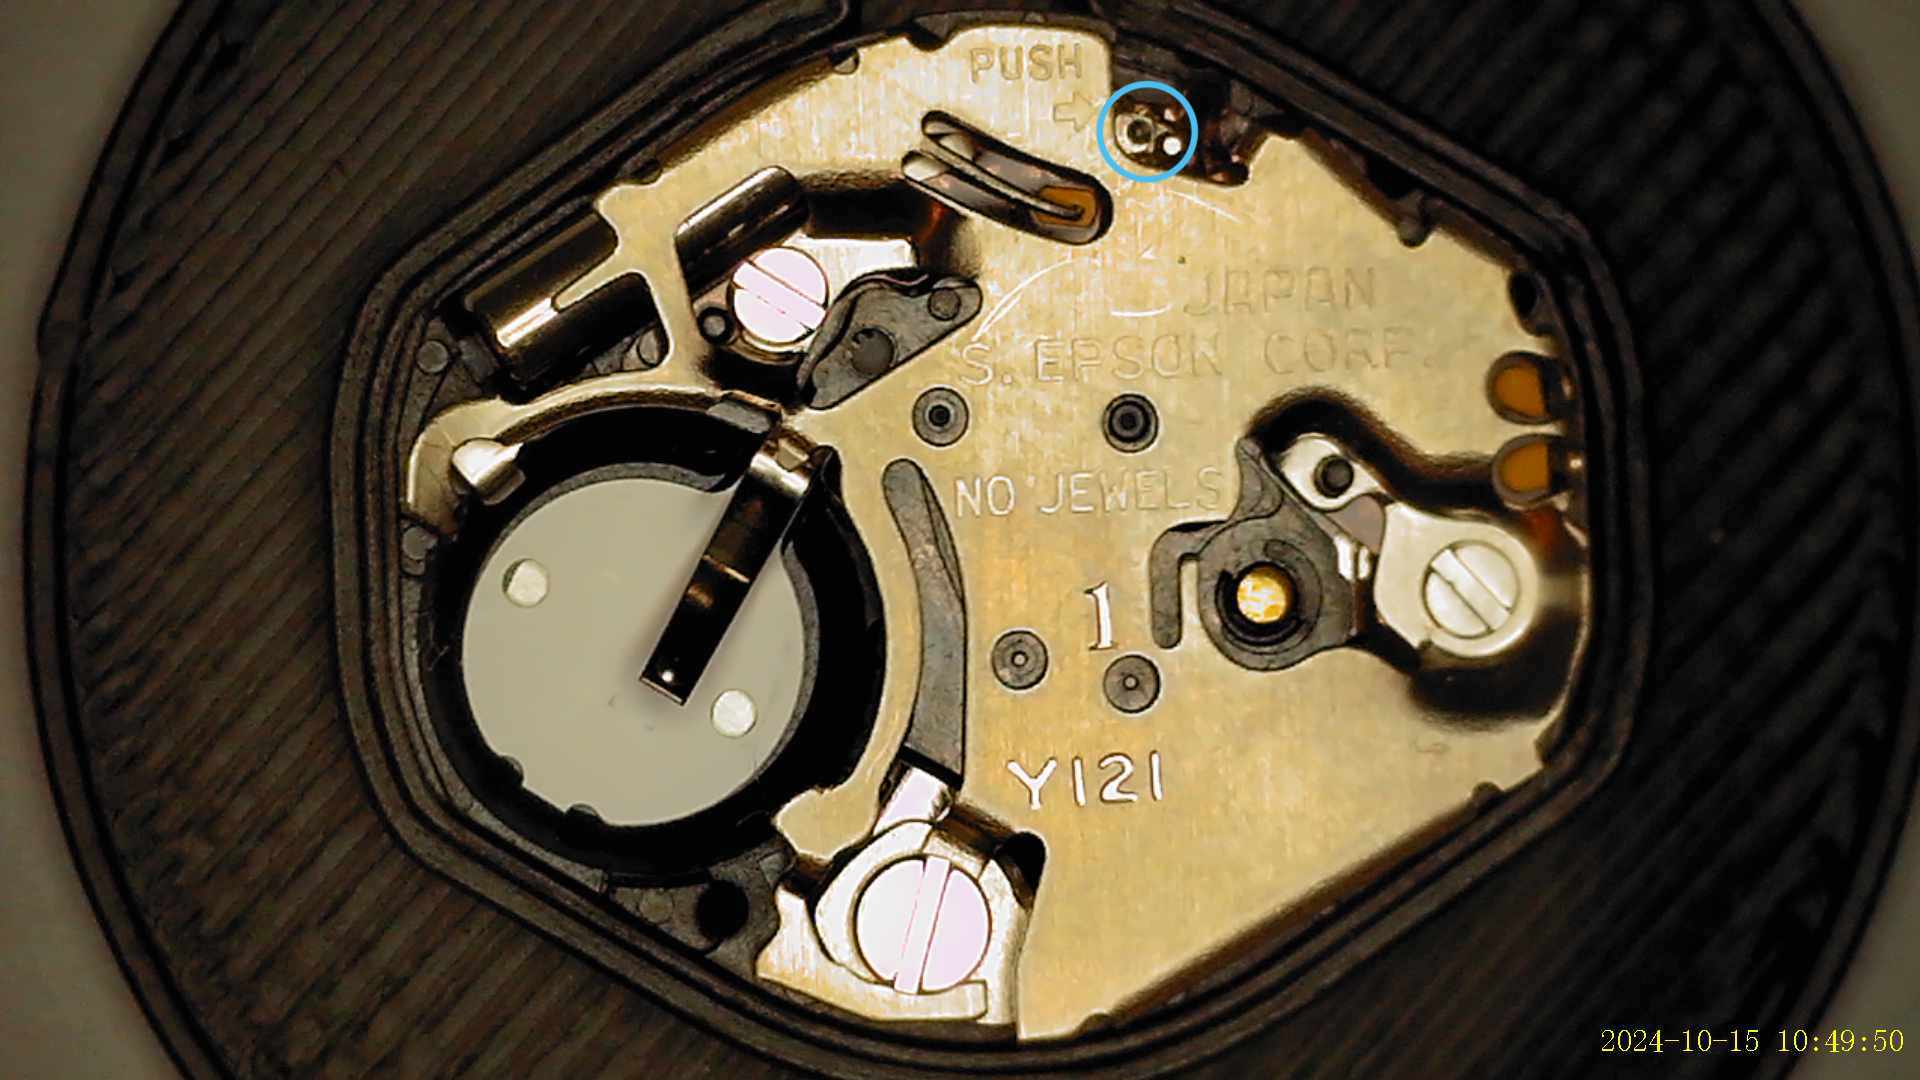
At the heart of Ozone is a Y121E Type S quartz movement from Epson. It’s a cheap movement readily available on esslinger that promises a battery life of about two years. The movement is meant for low-cost watches and offers an accuracy that reflects that: 20 seconds per month. That seems to be pretty standard for cheap quartz watches, and is fine by me. I’m not building a chronometer.
The movement datasheet says it is 15.3 mm long in the 3-9H direction and 18.2 mm long in the 6-12H direction. This makes it comfortably smaller than a US nickel. The movement casing is 2.99 mm thick, but the center posts (for the hands) extend the overall thickness up to 4.42 mm. Other variations of the Y121E have the same case dimensions but different center post lengths, which allows them to fit watches with thicker dials.
The front of the movement has a variety of holes but, from what I can tell, only three of them are intended to be used for mounting purposes (more on that later). The rear face of the movement has a battery compartment and a small mechanism that you push with a screw driver to install or remove the stem.
In these pictures, the movement is rotated counter-clockwise by 90 from how it’d normally be on your wrist. The 3H direction as at the top of the pictures.
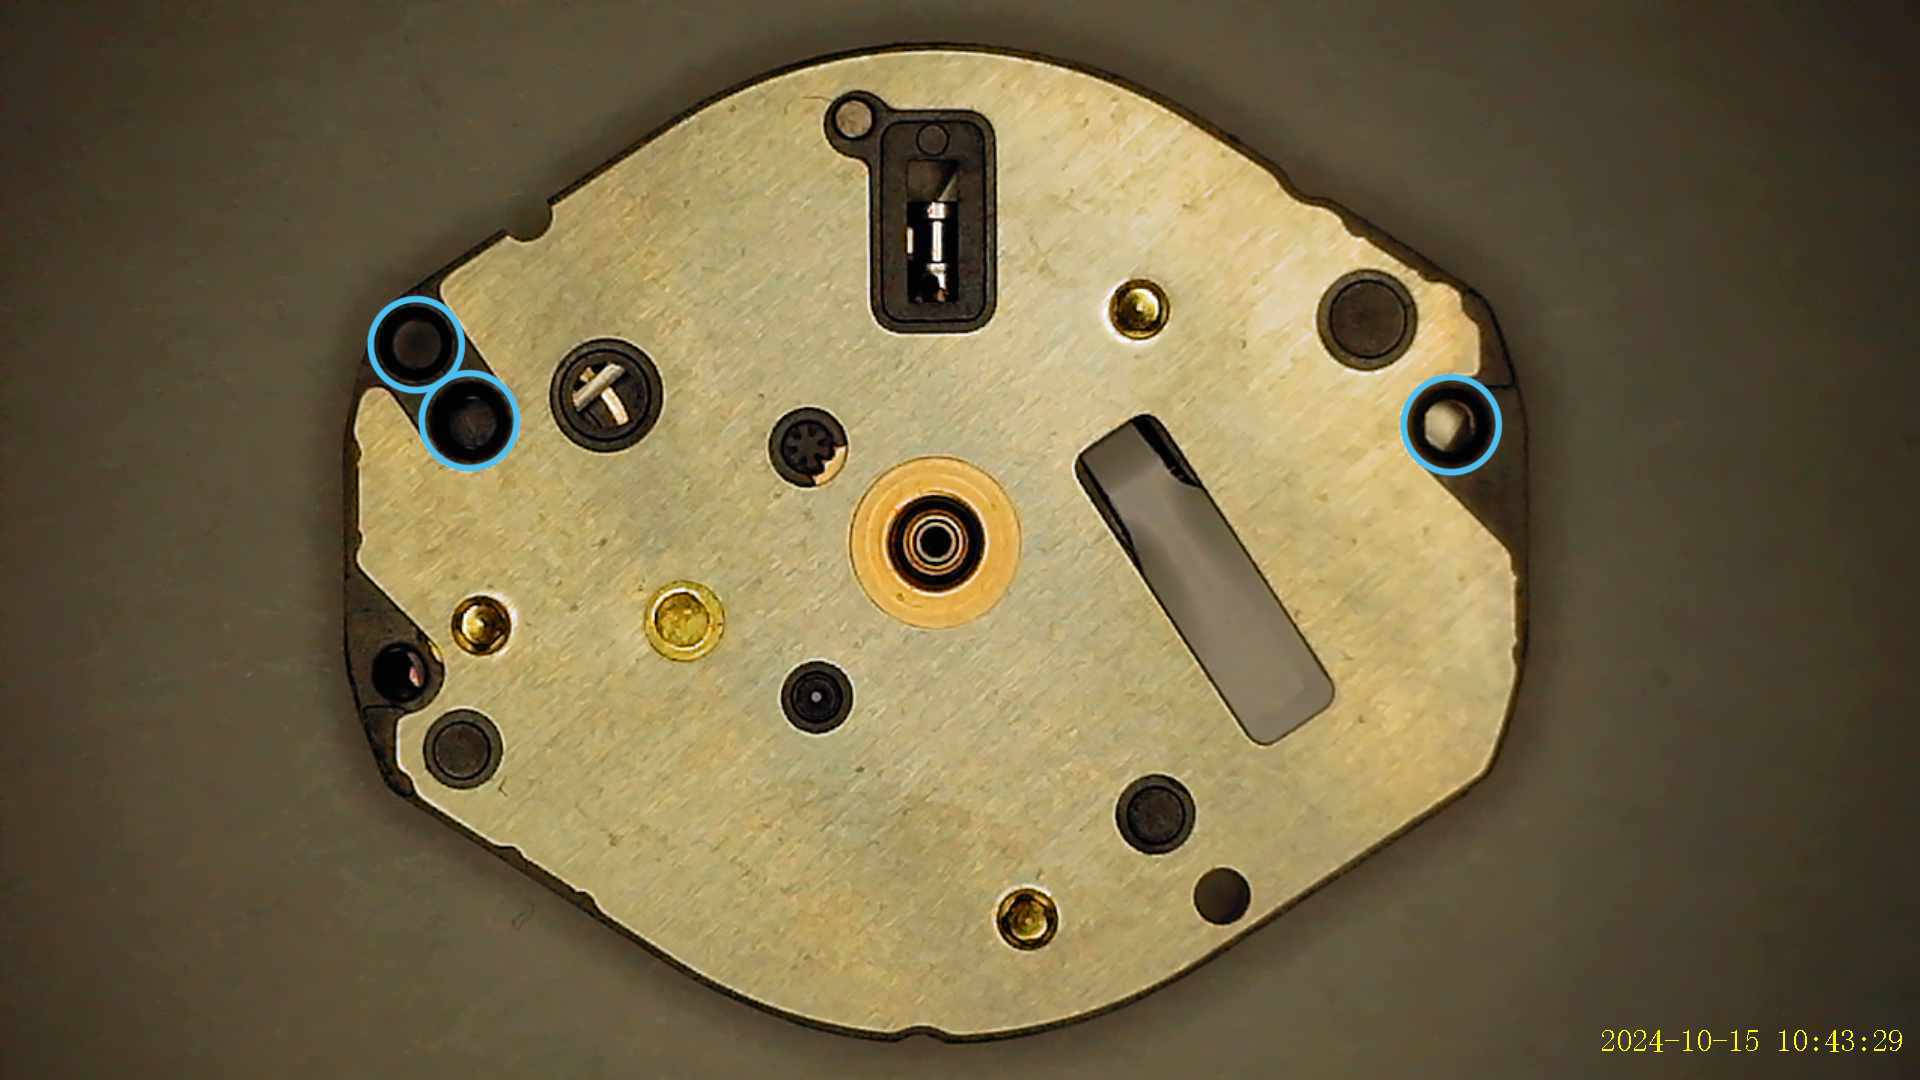
The mounting holes are not meant for directly mounting the movement to the case. Instead, the dial is supposed to have feet that go into the movement’s mounting holes, joining the two. The dial and movement then sit, as a unit, inside the case. To more securely hold the movement in place, a plastic retention piece is used. The retention piece pushes against the case walls, keeping the movement in place and reducing the chances of the small feet shearing off the dial. Finally, the rear case is installed and holds everything from the back.
I printed the retention piece from PLA and designed it so that it needs to be slightly compressed to fit into the case. This makes for a very snug fit.
That’s how things are supposed to go. In Ozone, there aren’t any feet holding the dial and movement together. Everything is held in place by compression. The dial ended up being more challenging than I expected.
The Dial
One of the more challenging parts of the project ended up being the watch dial. As mentioned above, dials usually have feet that slot into dedicated mounting holes in the movement, joining the two together. My original plan was to find dial blanks with feet that fit my movement, to paint the blanks, and then use waterslide paper to create the dial pattern. However, I couldn’t find any dial blanks with feet that fit. I had expected this would be the case, so my backup option was going to be to buy normal blanks and try soldering feet to them. I was unsure how reliably I could get the feet aligned and firmly attached, but I thought I’d try since I had seen others do it online. But when I went to add dial blanks to my Esslinger cart during an order, the dial blanks I had planned to purchase turned out to be unavailable.
Frustrated, I took a different approach. I purchased some thin aluminum sheet metal from Home Depot and roughly cut a piece about the size of a dial out of it. I then used a dremel to grind away at the edges, until the dial fit into the case. From here, I lightly sanded the metal until it was smooth and clean. I applied several coats of spray-paint, sanding between each coat, until the dial was white. I applied a clear coat on top and used waterslide paper to transfer my dial pattern onto the printed part. The result looked pretty good. It was hard to tell that the dial pattern wasn’t painted directly on the dial. The biggest tell-tale was the resolution that my friend’s laser-jet printer could achieve when printing onto the waterslide paper.
To install the dial, I used a small piece of double-sided tape to keep the movement and dial “secured” and then carefully installed them as a unit. Without the feet, it was critical to get the rotation of the dial and movement correct on the first try.
The resulting dial works pretty well. Under close inspection, it’s obviously not a professional watch. But during daily use, and even quick inspection, I think that it is satisfactory.